






These Related Stories


Share this
Ask any advisor what they need more of, and chances are they won’t say clients first—they’ll say time. While we’re incapable of offering you more than 24 hours in a day (if any outsourced solution claims otherwise, run in the opposite direction), we can offer you some of your time back. Whether or not you currently use XY Books for your bookkeeping needs, this blog is bound to save you some time. The only catch is that you use QuickBooks Online, which we would recommend anyway.
Learning how to automate the software and make it work for you (not against you!) is key. When used properly, rules can automate the categorization of most of your recurring expense transactions, transfers, and deposits, saving you time that could be a few hours or even months. The downside? If done incorrectly, rules can wreak havoc on your books and most certainly cause your hair to prematurely gray.

We recommend you start by creating simple rules for recurring transactions (think XYPN monthly dues), then increase the difficulty as you become more comfortable with the criteria for making a good rule. Let’s get started.
There are a few ways to access the rule creation tool in QBO. Let’s start with the easiest.
1. Create a rule from within the transaction.
To accomplish this, go to the “Bank Transactions” tab on the sidebar when you log in (if this sounds like gibberish to you, run, don’t walk, to schedule your setup and training service). From there, click on a transaction you want to work on. Toward the bottom of that transaction line, click the “create a rule” link (pictured below). This will allow you to set the rule and its criteria. QBO will pull data from within the transaction you select. This is hands-down the best and easiest way to create a rule. (Note: This can only be done with a transaction that is still “pending” or “for review”.)
 or (if using the updated view)
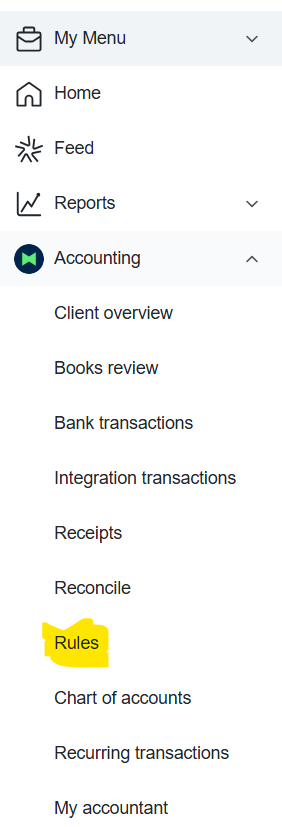
2. The next method is accessed directly from within the Accounting menu in the sidebar via the dropdown.
It should be the 7th option down in the menu, and you can click the bookmark to make it easier to access next time. Once you select it, you will be taken to the main “Rules” page. This is also a great way to easily see all the rules that have already been created and identify any errors associated with existing rules. If there is an error, you will see the specific rule highlighted in red with an error message above it.

Up next, how do you create a rule?
Follow the ABC process (fair warning: it has steps all the way through the letter "K") below to get your rule-adding game on track.
A. Using method #1 from above, click the “create a rule” button. The “create rule” tool will pop up on the right side of the screen.
B. Name the rule. Be sure to rename it rather than using the auto-generated (“suggested”) name to avoid cluttering your rule list when searching later. When naming the rule, be clear and concise (e.g., use 'Office Depot' for transactions made at Office Depot) to save yourself a headache down the road.
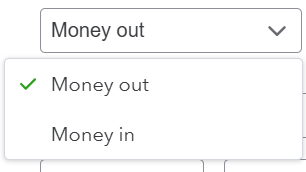
C. Set the “Apply this to transactions that are” criteria for which the rule will be applied. QBO will generally set this correctly when you create the rule directly from a transaction. If it’s an expense, double-check that “money out” is selected (as pictured below). Next to that will be another drop-down displaying the accounts currently connected to your bank feed. You can select as many accounts as the rule needs to apply to. If the expense could come out of any one of your bank or credit card accounts, click the box for “All Bank Accounts.”
D. Set the ‘conditions’ that QBO will use for applying rules; this is the most important part. You have two options:
1. Bank Text. Bank text data is on each transaction in the banking feed, as seen here:
It comes directly from the transaction details supplied by your bank, and should match what is on your monthly statement. You can specify the condition to Contain, Doesn’t Contain, or Is Exactly via the middle drop-down. Next to it, you can specify the bank text option. For example, if you select “Contains,” you could type “XYPN” to apply it to every transaction that includes it in the bank text description.
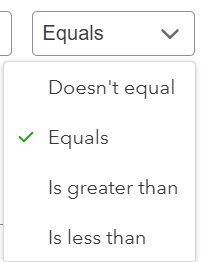
2. Amount. If the criteria you want QBO to search for is an amount, select “amount” and enter that number in the text box. You get different options for this condition, as seen in the screenshot. Typically, the “amount” criterion is used in conjunction with the “bank text” criterion, not as a standalone.
E. You will have the option to set the priority of the rule, and it will automatically assign the priority to whatever number rule it will be in your list. This is so that if you have an existing rule that meets the same criteria outlined here (such as an XYPN transaction that drafts at the beginning of the month, but your XYPN Compliance charge comes out separately mid-month), it will apply the rule with the highest priority. You can change it to any number you like if similar transactions are coming through. This is why the next steps are important for distinguishing between rules that may be similar.
F. For transactions that meet these criteria… You will have the option to either “Add Attributes” and additionally turn on Auto-post or “Exclude Transactions”. There are two dangerous options here:
-
-
If you select the exclude option, every transaction that comes through will be excluded from your bank feed. This is highly NOT recommended, as it would cause those transactions to no longer be visible on the bank register for reconciliation purposes or on any reports. I’m sure it could potentially be a beneficial option under the right circumstances, but 99% of the time, this will not be what you are looking for.
-
Toggling “Auto-Post” to on is also not ideal, as it will automatically add these transactions in without additional review. The conditions and attributes we are setting up will help ensure the rule is applied correctly, but errors can still happen, and if there is a mistake or a glitch, it can be like finding a needle in a haystack to even realize there is an error. If you feel comfortable with how the rule is set up, I would still recommend reviewing it for a month or so, then updating it to auto-post (at your discretion).
-
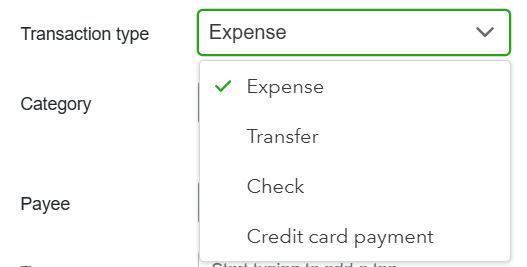
G. Next, select the transaction type. Expenses will be the most typical. Transfers are only used to move money between accounts you have connected in QuickBooks. Credit card payments are very similar to transfers, and if both accounts (payor and payee) are connected, QBO will ideally recognize the payments between them and match them automatically. We rarely, if ever, use the check transaction type.
H. Choose the category. This step is also very important as it will decide which account in your books the transaction will go to. If you are unsure which account to use, search for the vendor's name and see how the transaction was previously categorized.
Bonus: You can split a transaction into multiple categories. For example, if your mid-month XYPN dues contain E&O insurance and software and technology add-on items, you can split those out by amount by using the “Split by” function. If you have a shared bill (perhaps your family plan cell phone bill?), you can split the transaction based on business-versus-personal use percentages.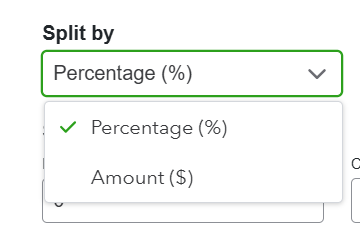
I. Add a vendor/payee. We’ve said this in previous blog posts, training services, webinars, office hours, basically to anyone who will listen… add a vendor or payee to every transaction. You will be thankful later.
J. There is a tricky last option you have that might throw you off. It will give you the option to “replace bank memo” and automatically fill in whatever the bank text is for the transaction you are basing the rule on. Underneath, there is a small checkbox labeled “Also keep existing bank memo”. I would highly recommend checking that box, because if not, it will overwrite the bank text with that default text from the original transaction. This may not seem like a big deal, but there can be variations in bank memos even if it from the same vendor (think DoorDash specifying the restaurant, a chain gas station that gives the address of the one visited, a Starbucks located in a different state that can be allocated as a travel meal vs a normal meal deduction).
K. Finally, you can test the rule, save the rule, and watch the little green “Rule” icons pop up on your bank feed.
You now know how to access and create rules, but we’re sorry to say the struggle isn’t over. Read on for my tips on best practices and how to tackle issues that might arise:
- If you have transactions for the same amount and vendor that recur each month, you should apply rules to them. If you have transactions you can never remember how to correctly categorize, you should apply rules to those, too, so you can save yourself the time of looking back at historical transactions to jog your memory.
- As mentioned previously, use multiple criteria, if possible. If you know you will have an expense of $160 to XY every month, use both criteria when creating the rule.
- Less is more. Instead of using “XY PLANNING NETWORK ACH LLC INC XYZABC” as the description for a rule, try using just “XY Planning.” It will work better and be more applicable.
- Specify an account. When a recurring expense is paid only from your credit card or checking account, specify that account when creating the rule. That way it won’t accidentally be applied to a similar transaction on an account you aren’t intending to categorize by that rule.
- Always add a vendor/payee when creating a rule. The only way to know how much you paid a vendor throughout the year is by ensuring they are tied to a transaction. Rules allow you to add a vendor.
- Rename the rule something generic but applicable. You want to be able to easily search for and find the rule if needed. I almost always name my rules using the same text I used for the “Description” criteria.
- If you created a rule and it worked well in the past, but it isn’t applying to a transaction, there is a chance that the criteria you made no longer apply. Be sure to go back and edit the criteria to apply to the revised banking details. Let’s look at a rule for XYPN dues as an example. When the rule was created, XYPN dues were $520/month, and the rule had two criteria: “Bank text contains: XY Planning” and “Amount = $520”. XYPN dues then increased to $544/month; as a result, the rule was no longer applied because the “amount” criterion was no longer accurate. Once the criterion is updated to reflect the new monthly dues (“Amount = $544”), the rule will work again.
- As mentioned earlier, if you go to the Rules page, then you can see all of your rules at a glance, along with any errors that may have popped up. Select “Edit” and update the rule accordingly. In this case, the category would need to be updated. Another common error could be an issue with the bank account or credit card if the account the rule was set up with is no longer active in your books.

At the start of this post, I mentioned that creating rules will save you time. And it will. But creating rules will take you time first. Once the rule is created, however, it’s smooth sailing because you don’t have to think about it. Simply select all transactions with rules applied, quickly review them, and accept them all at once.
If this is still over your head, reach out! We’d be happy to help you get your books in a row.

About the Authors
Share this
Subscribe by email
From Start to Scale: How Books Can Support RIAs at Every Stage of Growth

From Start to Scale: How Books Can Support RIAs at Every Stage of Growth
Nov 3, 2025
3 min read
When Outsourcing Saves You More Than Money

When Outsourcing Saves You More Than Money
Jul 14, 2025
5 min read
2024 Tax Updates: Key Changes to Be Aware Of